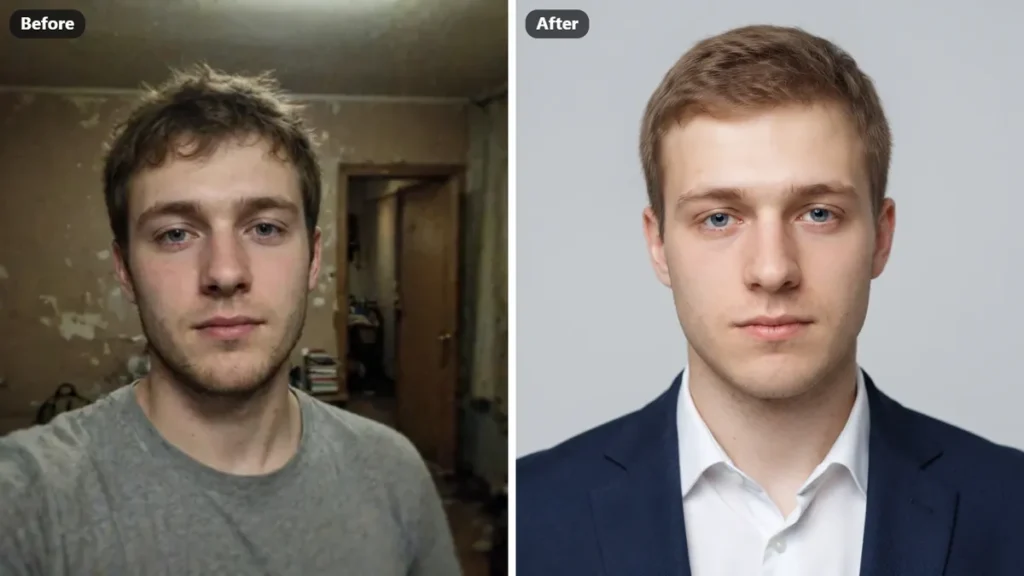
You spent time on the perfect AI edit. The face is exactly the same, the light is better, the photo finally looks the way you wanted. But when you post only the final photo, nobody can see how big the change really is. That is why before and after collages work so well. One picture shows where you started and what the edit did, and people stop scrolling to look.
The problem is most collage apps want a signup, add a watermark, or upload your photos to their server. So we built our own simple tool for the ImagePromptLab community, and in this post you will learn exactly how to make before after photo collages online, for free, in about a minute.
What Is a Before and After Collage?
A before and after collage is what you get when you combine two photos into one picture: the original photo and the edited photo. Instead of swiping between two pictures, the viewer sees the full change at one glance. Editors, makeup artists, salons, fitness coaches and home repair businesses have used this format for years because it is the most honest proof of a result. Now AI photo editors use it too, because a prompt result means much more when the starting photo sits right next to it.
Meet Our Free Before After Collage Maker
Our before after collage maker is a free tool that runs completely in your browser. There is no signup, no watermark and no app to install. Your photos are never uploaded anywhere, they stay on your device from start to finish.
- Free arrangement: drag each photo anywhere on the collage and resize it from the corners, like a real editor
- Full photo mode: the complete photo always shows, so faces never get cut off
- Before and After labels: small labels sit on each photo and move with it, and you can edit their text
- Ready sizes: Instagram, Pinterest, YouTube and square formats, or any custom size you type
- Three download formats: save your collage as JPG, PNG or WebP
How to Make a Before and After Collage
Step 1: Add your two photos. Open the tool and click the Before box for your original photo and the After box for your edited photo. You can also drag and drop the files in.
Step 2: Arrange the photos. The tool builds the side by side photo collage for you automatically. Drag a photo to move it, or drag its corners to make it bigger or smaller. There are also quick layouts if you want the classic look in one click.
Step 3: Frame each photo. If a face sits too close to an edge, hold Alt and drag to move the picture inside its frame, and use the zoom slider until it looks right.
Step 4: Pick your size. Choose the size that matches where you will post. Portrait for Instagram, tall for Pinterest, wide for a blog or YouTube.
Step 5: Download. Click Download collage and post it anywhere. That is the whole process, and it works the same on a phone.
5 Ways to Use Your Before and After Pictures
1. Show your Gemini prompt results. This is the best way to share an AI photo. The original photo proves the prompt kept your face the same, and the result shows what it improved. If you need a prompt to start with, build one in our Gemini AI prompt generator.
2. Show a photo quality fix. Old, blurry or dull photo on one side, clean enhanced photo on the other. Our photo quality enhancer prompts are made for exactly this kind of pair.
3. Compare DP and profile photos. A normal selfie next to a polished DP shows friends why the new one is better, and it makes a great post by itself.
4. Show restoration results. A damaged family photo beside its restored version is one of the most shared kinds of images online, because the change is emotional, not just visual.
5. Show your work. Makeup, hair, fitness progress, room makeovers, product cleaning results. If your work changes how something looks, a collage is your simplest portfolio.
Tips for a Collage That Gets Noticed
Keep the pair honest. The after photo should be an edit of the same before photo. Viewers can feel a real pair, and real pairs get saved and shared more.
Line the faces up. Make both photos about the same height and drag them so the faces sit at the same level. When the only thing that changes is the edit, the change looks bigger.
Keep the labels on. Most people will see your picture without any caption. The Before and After labels explain it in one second.
Match the size to the platform. The wrong shape gets cropped by the app, and the labels can get cut. Pick the ready size for the platform before you download.
Start from a strong after photo. A collage can only show what the edit did. Use a prompt that keeps the face exactly the same as the reference, so the pair looks natural.
FAQs
Is the before after collage maker really free?
Yes. It is completely free, with no signup, no watermark and no limit on how many collages you make.
Are my photos uploaded to a server?
No. The tool works inside your browser, so your photos never leave your phone or computer.
How to make before after photo collages on a phone?
Yes. Open the tool in your mobile browser, add the two photos, drag them into place with your finger and download.
How do I stop a face from being cut off?
Use the Full photo mode in the tool. It shows the complete photo without cropping, and you can still zoom and move the picture inside its frame.
Which size is best for Instagram and Pinterest?
For Instagram posts choose Portrait 1080 x 1350. For Pinterest choose Tall 1080 x 1620. Both are ready options in the tool.
Conclusion
A good edit deserves to be seen properly. A before and after collage takes one minute to make, and it turns a simple result photo into proof that people stop for. Try it with your favourite photo today: open the free before after collage maker, add your two photos, and download your first collage. Then come back and explore more free prompts on ImagePromptLab for your next edit.
